Corsair Carbide 300R flickering LED fix
 Friday, April 3, 2015 at 5:50PM
  Alan W
 Some Corsair Carbide 300R owners have mentioned a flickering LED problem with their PC cases – and I too got the same problem soon after I built a new PC. The white PWR LED would start to flash (as if going into Standby), then flicker, then (in my case) go off altogether. I thought it might be Windows power settings causing the PC to shut down, but it wasn’t. Jiggling the pin header on the motherboard made no difference.
Asus Tech Support guessed that the motherboard probably had a faulty header (unlikely) that "cannot output current on that channel. If necessary I should try using a different PSU with my motherboard. Contact the retailer if the issue persists... " I was none the wiser – was the motherboard, PSU or PC case at fault?
I believe in checking the simplest things first so I assumed the motherboard and PSU would be fine. I decided to test the LED itself with a separate p.s.u. – see later. To access the LEDs the Corsair Carbide 300R front panel must be removed.
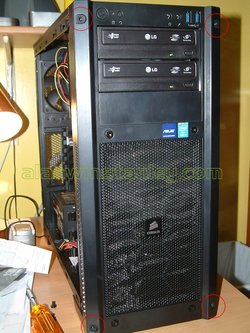
 Remove the four screws on the corners of the front panelRemove both side panels to reveal the front panel’s steel spring studs on the chassis. Four hex screws must first be undone on the corners of the front panel. The four screws on the grille are for decoration and can be left alone.
 Then pop off the front panel using a plastic pry toolAfter removing the four screws, pry off the front panel using a plastic tool (such as the sort to remove car trim panels, or a plastic pry tool used to take gadgets apart). Be firm but not brutal and the front panel will then pop off without a problem. The DVD drives remain in place.
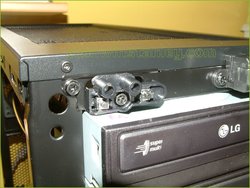
 A single screw holds the LED/ switch panel in placeThe switch/ LED panel is held in place with one screw. Remove it and the panel will loosen.
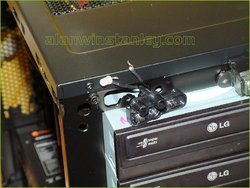
 Using a bench PSU to test the LED - it litI could then access the PWR LED for testing with a separate variable voltage PSU. I carefully powered up the LED from zero volts (maximum, say 5V d.c. or so), observing the correct polarity and it lit up OK to begin with.
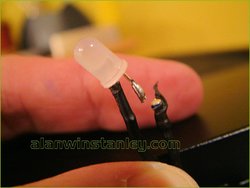
 The series resistor fell off the LED - the solder joint fracture caused the flicker problemSo (assuming the motherboard header was OK) maybe the fault was a loose connection somewhere. It turns out the LED has a series limiting resistor within the heatshrink sleeve (blue-grey-black-gold = 68 ohms, estimated 1/8 watt). I jiggled the wires and the LED started flickering. In fact the resistor lead then fell off altogether, so the poor connection was the likely cause.
In my view the problem’s caused by the lack of any strain relief on the Corsair Carbide wiring loom, or, the LED soldering was a dry joint. When routing the wires through the case and hooking them onto the motherboard, it’s probable that this strained the LED soldered joints and eventually caused them to fracture.
 The broken solder joint. The LED and resistor were replaced.Not recommended for beginners, but I replaced them myself with a spare 68 ohm (¼W) resistor and a white 5mm LED. I soldered and heatshrinked these onto the end of the existing wires (observing polarity of course) and reconnected them to the motherboard header and everything worked.
After contacting Corsair Tech Support and emailing proof of purchase, they immediately rushed a new switch/ LED / front panel wiring loom assembly next day. Corsair's support and repair service was fautless, even during a holiday period. The Corsair Part No. is CC-8930041


Reader Comments